
Safe Food Preservation: A Complete Step-by-Step Guide for Beginners
- Lisa Moll

- 5 days ago
- 4 min read
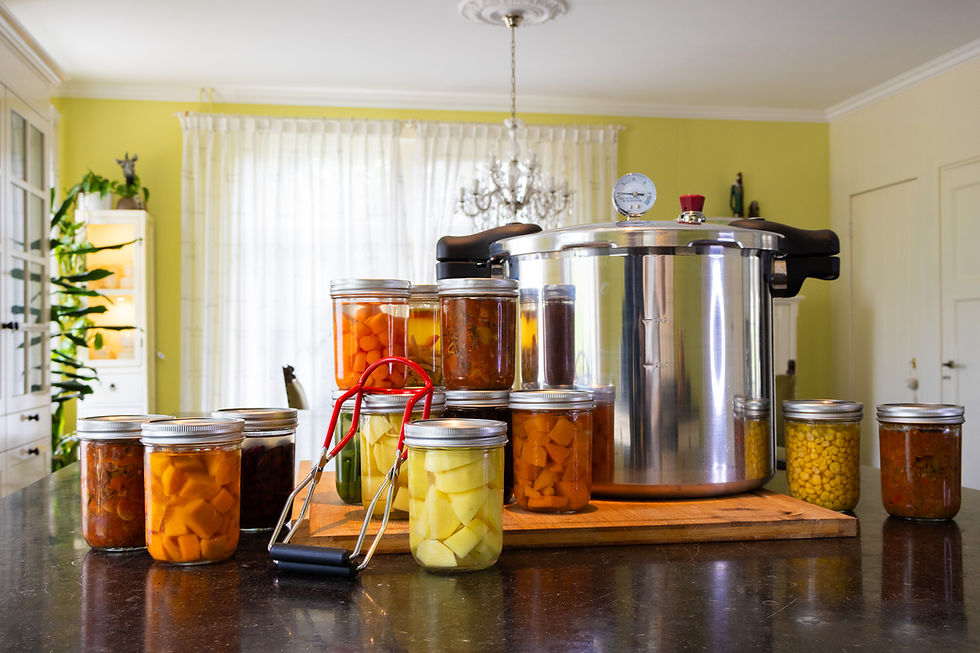
IIn this blog, we'll walk you through the entire pressure canning process step by step, so you can preserve food safely. Follow the steps carefully and in the correct order — the CanMate does most of the work automatically. You just need to guide the process along.
Step 1 — Fill the canner
Place the rack in the canner to create space between the rack and the bottom.
Add the correct amount of water (see specifications).
Place the filled jars upright in the canner.
Make sure that:
the jars are not touching each other
the jars are standing stable
Using two layers of jars? Place the stacking rack between the layers.
Step 2 — Close the lid
Check that the sealing ring is properly in place.
Place the lid on the canner.
Turn or lock the lid in the closing direction.
⚠️ Do not place the weight on the vent yet.
Step 3 — Heat and vent (very important)
Turn the heat source to high.
After a few minutes, steam will begin to escape from the vent. Allow this steam to flow continuously for at least 10 minutes.
Why this matters:
air must first be removed from the canner
only pure steam ensures the correct temperature and pressure inside the canner
Do not skip or shorten this step.
Step 4 — Place the weight
After 10 minutes of venting:
carefully place the weight on the vent
select the correct pressure setting (0, 1, or 2 rings)
Pressure will now begin to build inside the canner.
Step 5 — Bring the canner up to pressure
Pressure will rise gradually.
When the correct pressure is reached:
the weight will begin to rock gently
you will hear a soft hissing sound
Now reduce the heat until the weight moves in a steady, gentle rhythm.
✅ A gentle rock = perfect pressure.
The weight should not rock wildly or release a continuous blast of steam.

Step 6 — Start the processing time
Once the weight is rocking gently, start the processing time as indicated in your recipe.
During processing:
check occasionally that the weight continues to move
adjust the heat slightly if needed
otherwise leave the canner alone
You don't need to monitor the pressure gauge closely — the weight regulates the pressure automatically.
During the process
Normal CanMate behavior:
✅ weight rocking gently
✅ occasional hissing sound
✅ stable pressure gauge
Not normal:
❌ weight not moving at all
❌ excessive steam release
❌ boiling dry (no water remaining)
In these cases, adjust the heat or stop the process.
Important to remember
Do not turn up the heat to reach an exact PSI number.
The weight determines the correct pressure.
Steady, consistent heat gives the best results.
When the processing time is up, pressure canning isn't finished yet. Allowing the canner to cool down is an important part of the preservation process and ensures the jars seal properly.
Take your time with this — the CanMate now does the rest on its own.
Step 7 — Turn off the heat
When the processing time is up:
turn off the heat source completely
only move the canner to another burner if the heat source cannot be turned off immediately, such as with gas
Step 8 — Allow the canner to cool naturally
The pressure inside the canner must drop slowly and gradually. This takes some time, depending on the contents and number of jars.
⚠️ Never speed up the cooling process.
Do not:
pour cold water over the canner
lift the weight
open the vent
Cooling too quickly can lead to:
liquid loss from the jars
a poor seal
cracked jars
Trust me — patience really does give the best results here.
Step 9 — Verify that pressure has fully dropped
The canner is only safe to open when:
✅ the pressure gauge reads zero
✅ no steam is escaping
✅ the weight is still
Then carefully remove the weight. Use an oven mitt or kitchen towel to be safe.
Wait another 10 minutes before opening the lid — by then there will be no pressure difference between the inside of the canner and the outside.

Step 10 — Open the lid safely
Always open the lid away from you. This prevents any remaining steam from reaching your face or hands.
Lift the lid slowly and let the condensation drip back into the canner.
Wait another 10 minutes before removing the jars.
Step 11 — Remove the jars from the canner
Use a jar lifter.
Place the jars upright on a cloth or wooden surface.
Do not place them on a cold countertop.
Leave space between the jars so they can cool properly.
⚠️ Do not tighten the lids and do not tilt the jars.
Step 12 — Let the jars rest
Let the jars sit undisturbed for at least 12 to 24 hours.
During this period:
a vacuum forms
the lids seal permanently
the contents stabilize
You will often hear a soft “pop” sound — this means the vacuum has formed.
Step 13 — Check the seal
First allow the jars to cool completely, then check each jar to ensure the seal is correct.
Mason jars (two-piece lids):
loosen the ring and remove it
gently check whether the lid is firmly vacuum-sealed
Jars with screw lids:
the lid should be slightly pulled inward
it should not click when pressed
Weck jars:
remove the clips
check whether the lid stays in place
No proper seal?
place the jar in the refrigerator and use it soon
or process it again
Step 14 — Cleaning and storage
As a final step:
dry the jars
label them with contents and date, or write this information using a chalk marker
store the jars preferably in a cool, dark place
For storing mason jars, it is better to remove the screw bands. This way you can quickly see if a jar has lost its vacuum seal.
Well done!
You have successfully pressure canned. After doing it a few times, it will quickly become routine.

Comments